kruikzak maken/Water jar bags


Water jar bags to warm the crib. Easily made and can be inexpensive when you use scraps of fabric.
 
You will need;
 
Scraps of fabric
biais
sewing materials
sewing machine
 
 
First measure your water jar. Choose the size of fabric you want for the top part of the bag.

 
I finished the top with my serger.

 
Make a seam and stitch.

 
The top of the bag is now nicely finished.
 
 
Make the bottom of the bag with all your scraps of fabric. You can use a serger, it works nice and fast. When you finished the bottom part you can sew it together with the top part. Good sides together. After that you can also close the sides and bottom. 

 
Take your biais and stitch it to close the sides.


Take the middle of the biais and stitch it in the side seam of the bag.

 
And this is how it turned out!!


DIY playpen blanket and toys bag


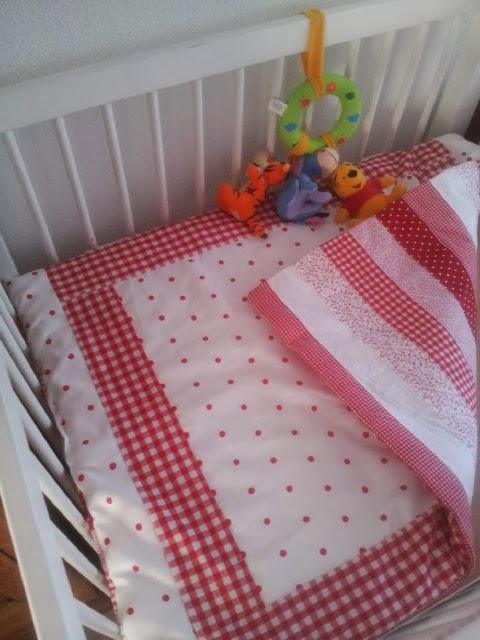
I made this toys bag and matching playpen blanket for our little girl. My husband picked the fabric and colours. Below I will show you how I made the toys bag, this is what you will need;
 
fabric 2 yards
fabric scraps
velcro
all your sewing materials
sewing machine


This is the bottom piece 14 x 10 inch / 35 x 25 cm

 
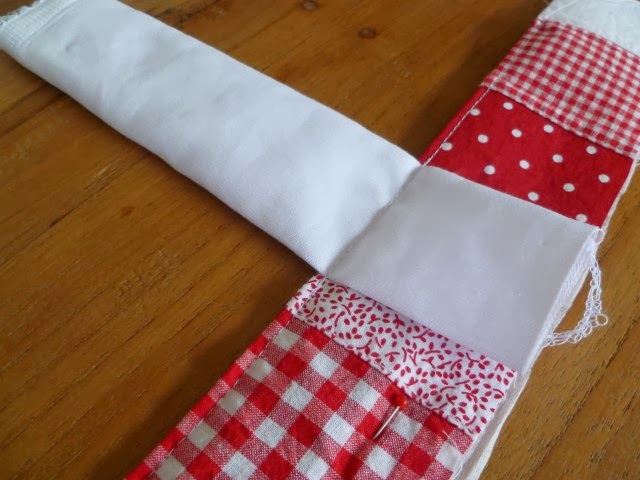
This is the fabric you need for the bag. I sewed different kinds of fabric together and it's about
5 ft x 2 ft / 1,50 m x 0,60 m
 
 
The bottom piece is combined with a thick layer of white cotton.


I didn't want a rectangle bottom, so I cut round corners. 


The large piece of fabric, the bag to be, is pinned down (good sides together) onto the bottom piece. The way you see the picture above....that will be the inside of the bag.

 
I gave the bottom some cut notches for flexibility.

 
This is the fabric for the inner bag. Take the same measurements from the outer bag and sew the same way.


These three pieces of fabric will be the hanging system. Fold your fabric in half lenghts wise, pin it down, sew and turn your fabric. The measurement depends on what kind of playpen you have.....so measure the distance between 2 bars.


This strip of fabric with interfacing is used to finish the top of the bag. Measure the perimeter, add 2 inches to be sure, cut the fabric and iron on the interfacing.


I folded the strip in half lenghts wise and attached the three pieces of fabric for hanging with my sewing machine.


Remember to stitch some cord on the left and right side in the strip of fabric. This is what you will use later to close the bag. I made the stitch exactly in the seam.


Put the outer and inner bag inside each other, wrong sides together. Pin the strip of fabric to the bag, good sides together and stitch. Make sure your hanging system is at the back, so it can be attached to the playpen.


I took my needle and thread to sew the strip onto the bag. It was a lot of work, but it is worth it, because I could see front and back where to put the stitches.
 
 
With left over scraps I made two pockets. I finished the edges rough with a serger.

 
I cut two hearts from another scrap.


Pin it down and sew. 


Sew them where ever you want them on the bag. I choose to sew one left and one on the right side. 


Pin the bag around the playpen to see where you have to put the velcro. Pin the velcro and sew it. 

 
And this is the finished toys bag!!

The nursery


It looks like I haven't being doing creative things lately, because I didn't post a lot on my blog. But the opposite is true. Since we know we are pregnant with our first child my creative brain and hands have been making overtime behind the scenes. All those ideas I gathered over the years are having a chance to come to life underneath my hands. It started with a baby crib that my mother bought at the thrift store, soon after that my uncle and aunt told me they had my dresser from childhood, if I wanted it back.......yes, nice!! So we began with sanding, primer, sanding and painting the furniture.


The last couple of month I collected all kinds of (photo)frames from the thrift shop. We sanded them, put primer on it and did different kinds of finishings. We gave it a bit of a rustic look. With al types of patterned paper I made a collage with birds, a tree, butterfly and more. It is hanging above the crib.


I wanted to make hanging fabric baskets for a while, so no better reason to make them for my own daughter. Above the dresser we placed a rail with hooks. I attached a fabric tunnel to the baskets so I could slide them over the rail.

Easy gift tag

 
It's easy and super fast to make a nice gift tag. Take a piece of scrap paper and cut the size you want with pinking scissors. Stick a beautiful 3d - sticker on the paper and punch a hole. You're ready to finish your gift!!

Mural for my niece


2 Months ago I made this mural for my niece and her soon to be born son. The nursery is all about 'Nijntje', that is the name of the bunny and is well known in Holland. Three weeks ago she gave birth to a healthy baby boy and his name is Mick.
 
Welcome to the family Mick!
 
 
To make it easier they lend a projector. We used a large box to put it on and aimed for a spot just above the crib. The above image was the first to go on the wall.

 
They also found a nice verse to go with it. So that was step 2.
 
 
We finished with some stars. Everything was painted with acrylic paint, dark grey and different kind of brushes.


Related Posts Plugin for WordPress, Blogger...